
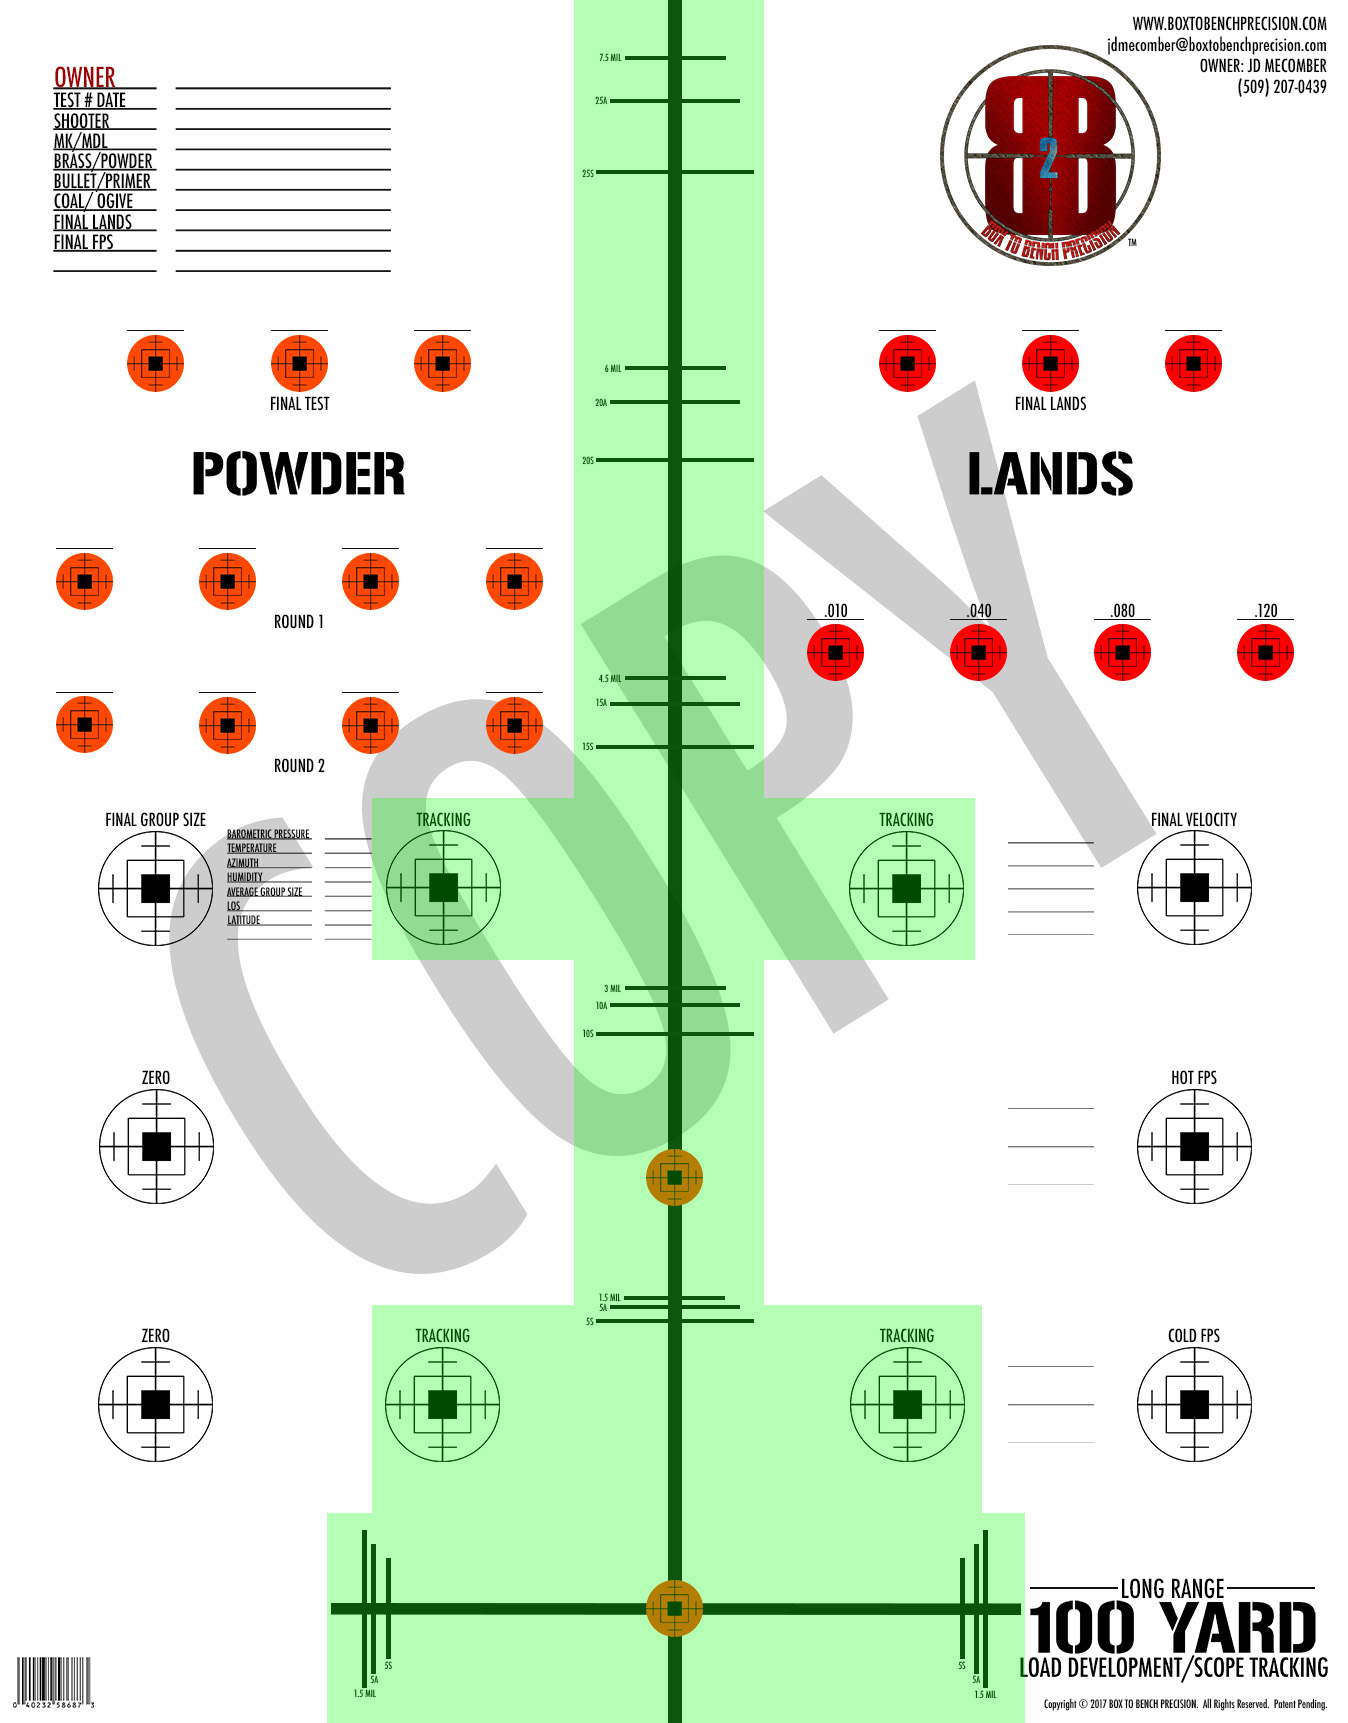
The below images break down the target components in full detail. Each of the pictures highlights one specific target component.
Scope Tracking Test 2017 Version:
These instructions are for the 2017 Version. The 2017 version is sold out, but we will leave the these instructions up for customers who might still have some. Please see the new box test instructions covered below.
The Scope Tracking test is two parts: vertical and horizontal tracking, and box test.
First, I will cover the box test. The “Box Test” consists of four 2 moa (two inch) spots and one 1 moa (one inch) spot. The one moa spot is the POA (point of aim) for the test. It is located approximately 7.5 moa (7 ½ inches) up from the one inch spot at the intersection of the vertical and horizontal reticle line used for the tracking test.
The entire box test will be conducted while aiming at the 1 moa POA spot. The four remaining spots for the box test are 2 moa spots with ¼ moa (1/4 inch) graduated lines for rapid shot placement reference. Each spot gives the shooter a 2 moa variable.
All four spots are centered 4 moa left and right from the vertical line. This gives you a horizontal test on each spot from 3 to 5 moa off the line, with a total left right test of 10 moa.
From POA down, you are 4 moa to center of the two lower spots. This gives you a variable of 3 to 5 moa down for this test.
From POA up, you are 5 moa to center of the two upper spots. This gives you a variable of 4 to 6 moa up for this portion of the test, giving a total up down test of 11 moa.
You can use ¼ moa marks to conduct the test in a manner you determine appropriate for your personal testing. There is also room on the target to customize your box test with stick-on spots.
Just remember, once you complete your test, the desired outcome is for the last shot you take after returning your turrets to zero, to be very close to dead center on the POA spot.
The box test can be as brief as 5 shots and as in-depth as 25, whichever meets your requirement.
The Brief/Simple Box Test 2017 Version.
Using the same POA spot, turn the elevation turret up 5 moa and windage turret left 4 moa. Take one shot.
Turn the windage turret 8 moa right, and take one shot.
Turn the elevation turret down 9 moa, and take one shot.
Turn the windage turret left 8 moa, and take one shot.
Return both turrets to zero, and take one shot. This shot should be on the POA spot.
The desired outcome is to hit each spot very near center.
In Mils, a bit is lost in the conversion since mils is in tenths. What you will be looking for is uniformity in your shot placement from right to left and top to bottom, each side of the vertical reticle.
Using the same POA spot, turn the elevation turret up approximately 1.4 mils, and turn the windage turret left approximately 1.1 mils. Take one shot.
Turn the windage turret approximately 2.2 mils right, and take one shot.
Turn the elevation turret down approximately 2.5 mils, and take one shot.
Turn the windage turret left approximately 2.2 mils, and take one shot.
Return both turrets to zero, and take one shot. This shot should be on the POA spot.
Once again, the desired outcome is to hit each spot very near the center
Verticle and Horizontal Tracking Tests 2017 Version.
The 2018 Version have IPHY in place of Shooter MOA or .25 inch increments, MOA is true moa at .26175 inch increments, and Mil for Milliradians or .36 inch increments.
The vertical and horizontal tracking test will both use the POA spot at the intersection of the vertical and horizontal reticle lines.
Horizontally you have three marks left and three marks right. The lines indicate 5 “shooter moa”, 5 “actual moa”, and 1.5 mils. Shoot one shot each, left and right, and look for shot placement coinciding with your actual scope values. Return windage turret to zero.
For the vertical portion of the test, you have sets of marks for 5, 10, 15, 20, and 25 moa, both actual and shooter moa. You also have a mark for each of 1.5 3, 4.5, 6, and 7.5 mils. One shot for each increment is required for this portion of the test, and all shots will be taken while using the POA spot at the intersection of vertical and horizontal reticle lines.
Once the last shot is taken at the greatest moa/mil value, return your elevation turret to zero and take one last shot. This last shot should be center of the POA spot.
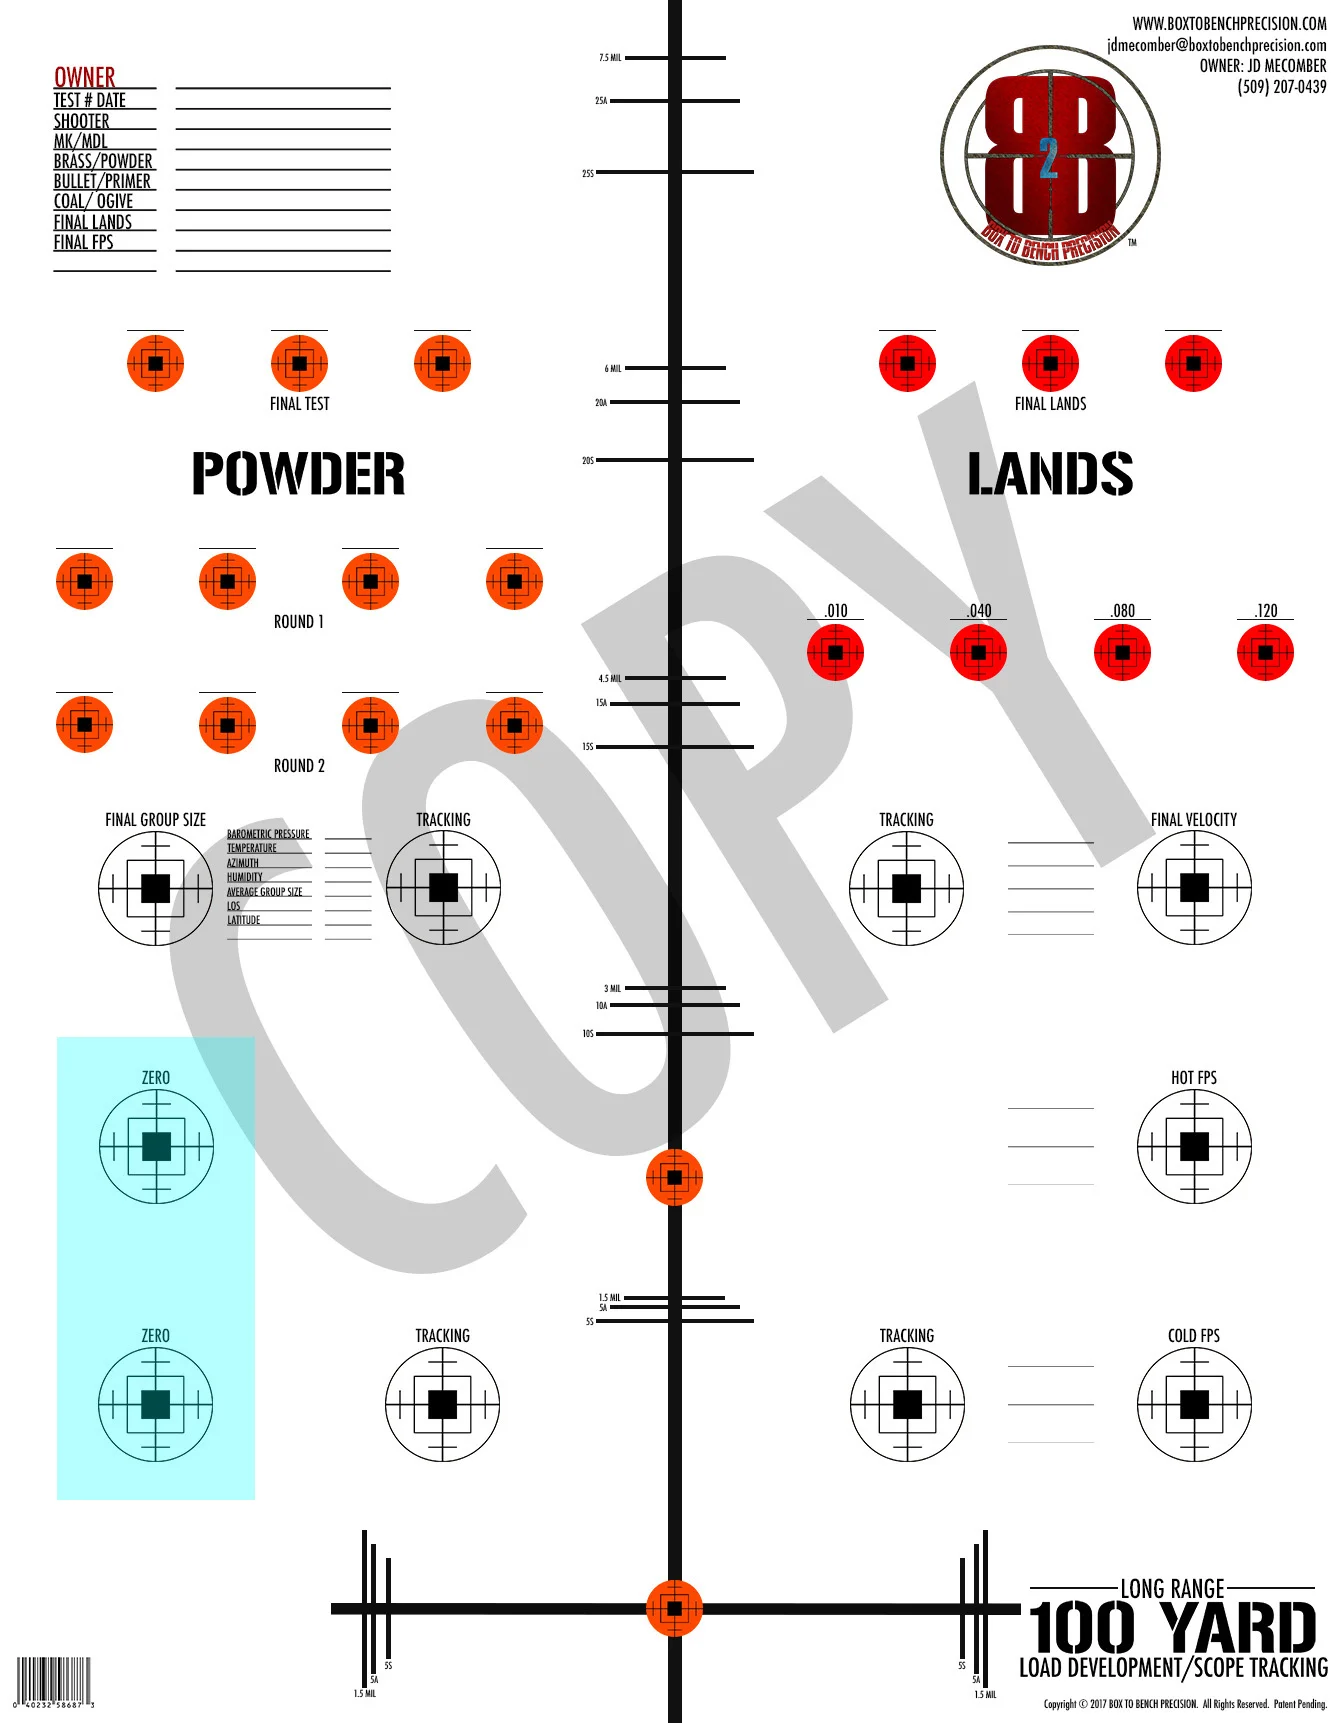
The Zero Spots:
The 2 extra zero spots are provided for any purpose the shooter deems necessary, however, we suggest using one or both to record POI (point of impact) changes related to muzzle devices.
This would be a device on, device off test to see how much the POI changes.
This particular test would pertain to muzzle brakes and suppressors.
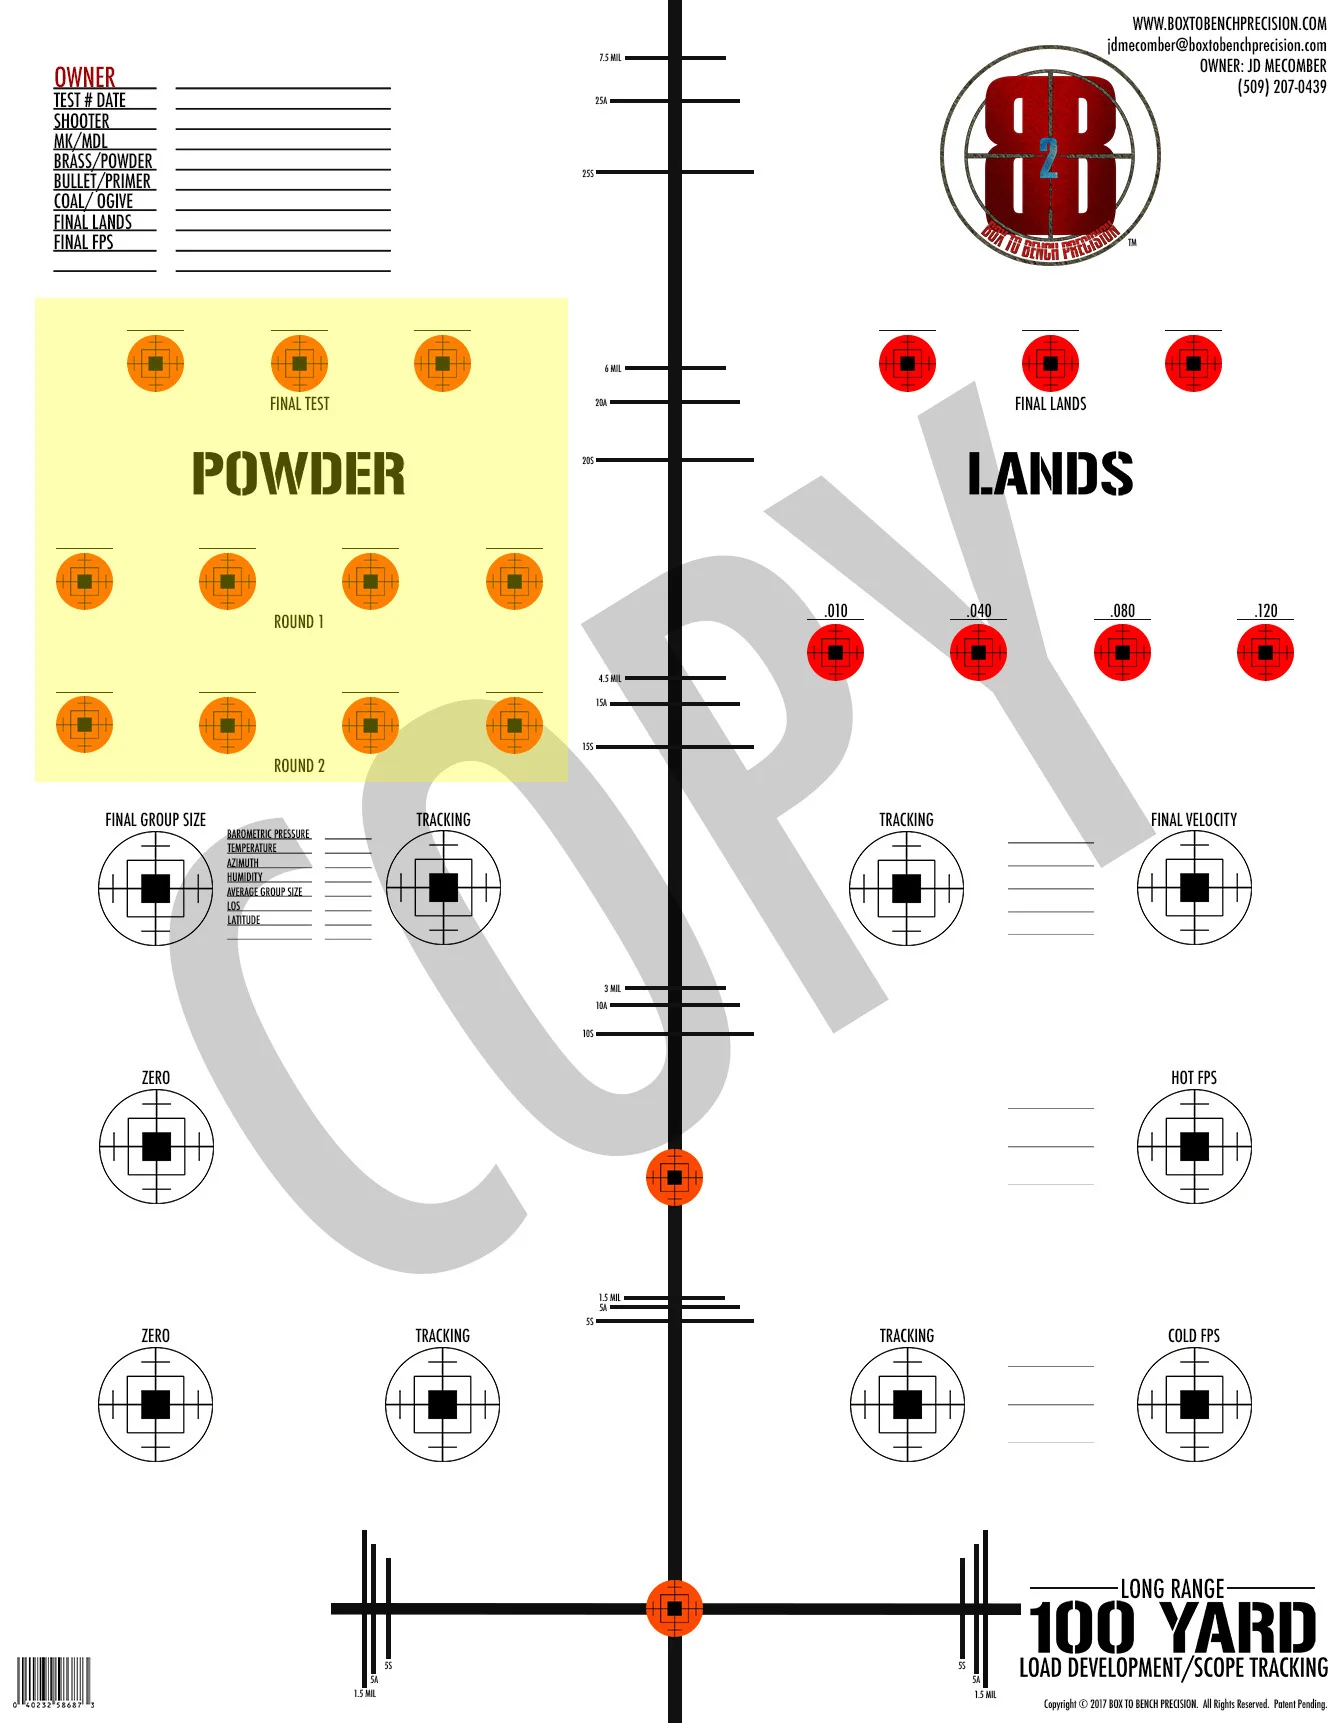
Powder Test:
Note: Conduct the powder test at .040 off the lands.
• Reference load manuals for your powder choice. A good place to start is the manual from your intended bullet manufacturer. Compare loads from as many modern manuals as possible.
• The test provides a “ROUND 1” and a “ROUND 2” that will be considered your choice of two powders to compare accuracy. Begin the tests with charge weights on the low end of the recommendations in any modern load manual and work up in approximately 3 tenths of a grain increments. Assign a charge weight to each spot and take 3 to 5 shots at each spot, observing group size while being alert for signs of pressure.
• Read about and understand signs of increasing pressure as every rifle is different and will react to increases in powder charges differently from the next rifle. Load manuals are for reference only and the hand loader must be ever vigilant for signs of increasing pressure at the primer and through sticky or heavy bolt lift.
• Do not be concerned about velocity during the powder test as this test is accuracy related. Accuracy often peaks well below max indicated velocities in the load manual. I will add that this is not always the case as barrels longer than the specified test barrel length will often produce a bit more velocity whereas a barrel shorter than the test barrel length may produce lower velocities.
• Once you have shot all groups from both powders, pick the best group and move on to the Final Powder Test. You have 3 spots to assign charge weights to, and you can go with slightly more powder if you haven’t detected any signs of increased pressure, or you can slide down a bit or just verify your results from the first comparison to pin down the most accurate charge weight for your rifle.
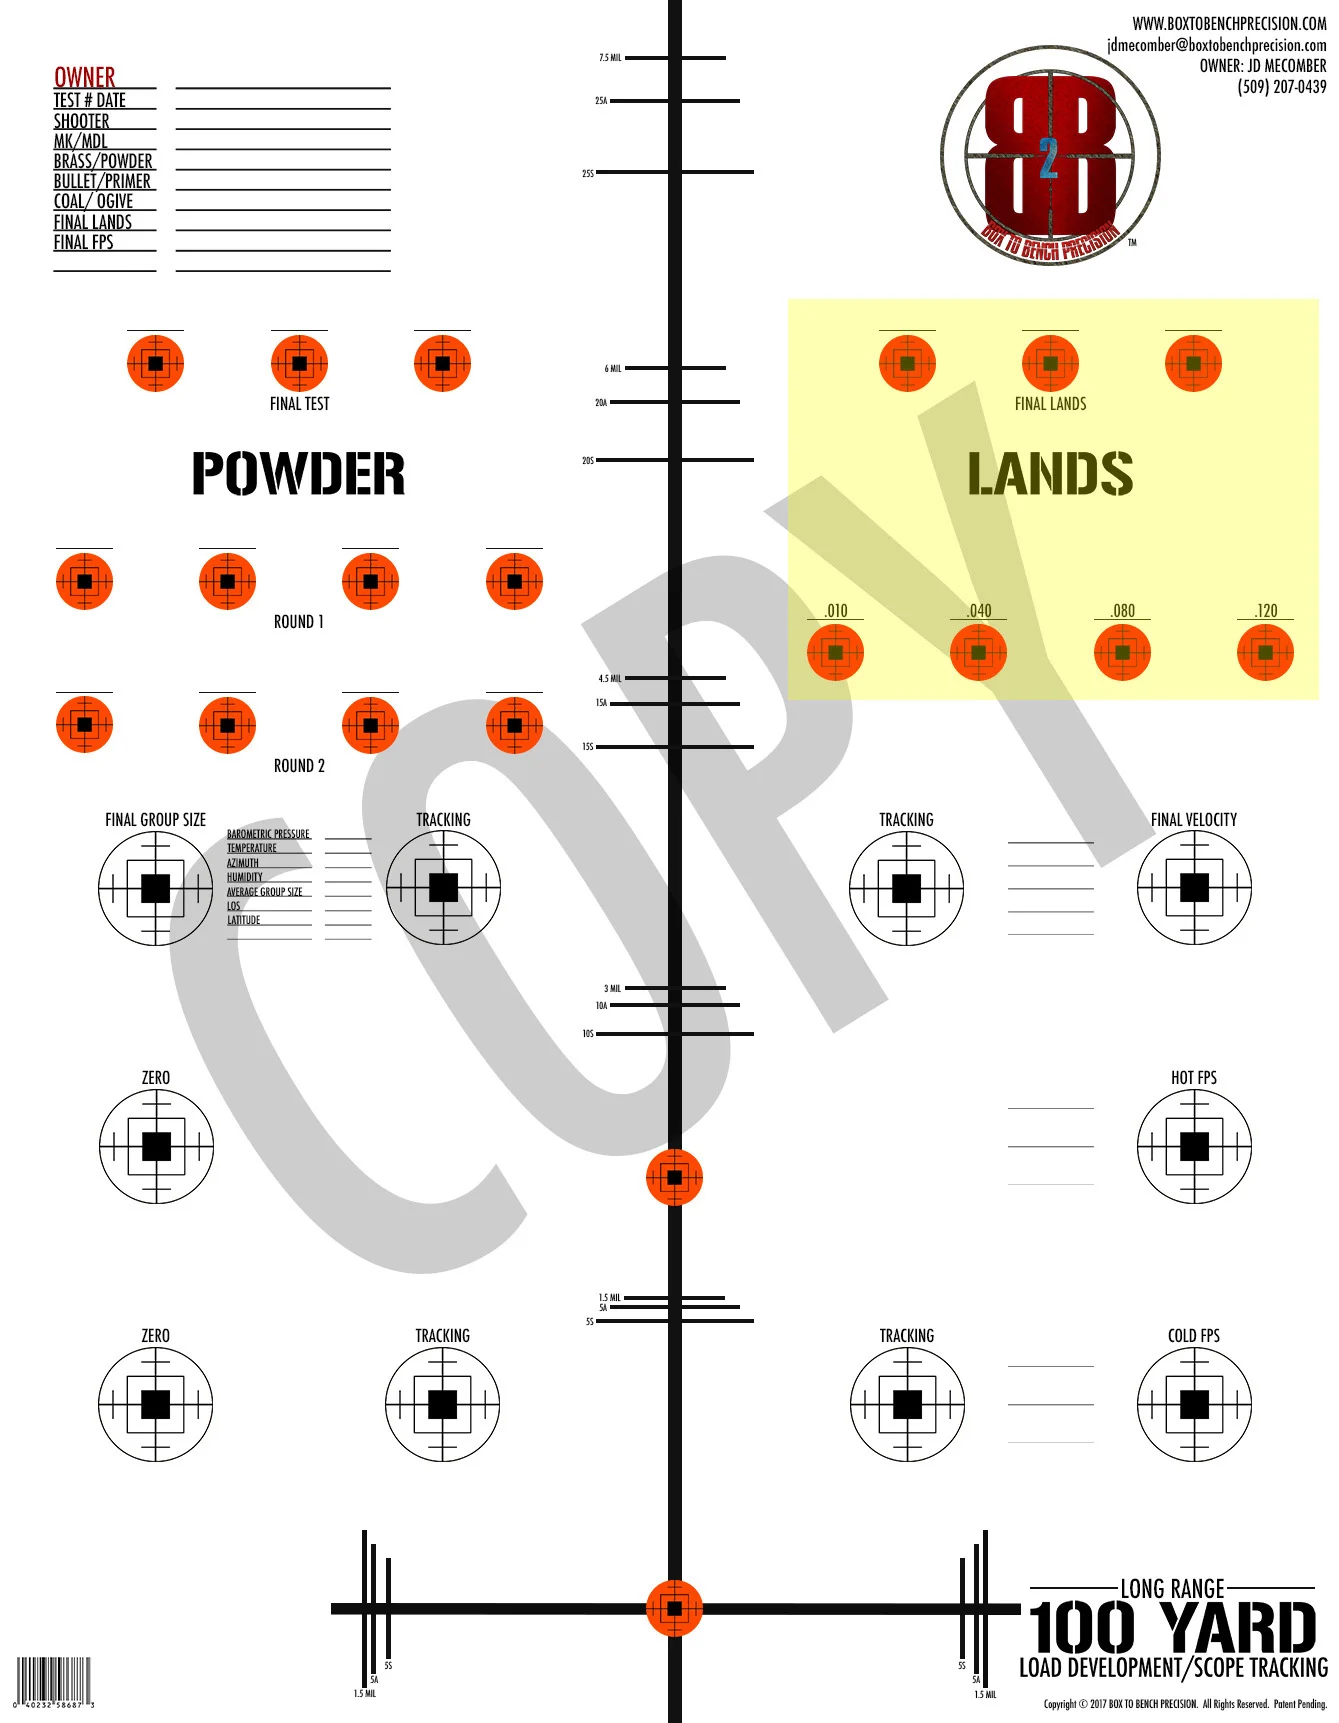
Lands Test:
The “Lands Test” determines the bullet seating depth. The four spots marked .010, .040, .080, and .120 are the beginning measurements of the test. Four or five rounds are to be loaded for each spot. After you have determined the distance to the lands for your rifle, proceed to load the four to five rounds at each interval.
Fire each group of test rounds at their appropriate spot in order to observe a “best” group. Once you have selected the best group, note the measurement off the lands and proceed to the “Final Lands Test”. If your best group was at .040, then mark a spot for .010 over (.050) and one .010 under (.030) to see if the groups improve or not. Do this same procedure for .080 and .120 if one of them indicates the best group. If .010 indicates the best group, mark the spots for an under of .008 and an over of .015. The third spot can be used to go up or down another small increment or duplicate the original best group for verification.
As with all load development tests, be sure to allow adequate time for barrel to cool down between shots.
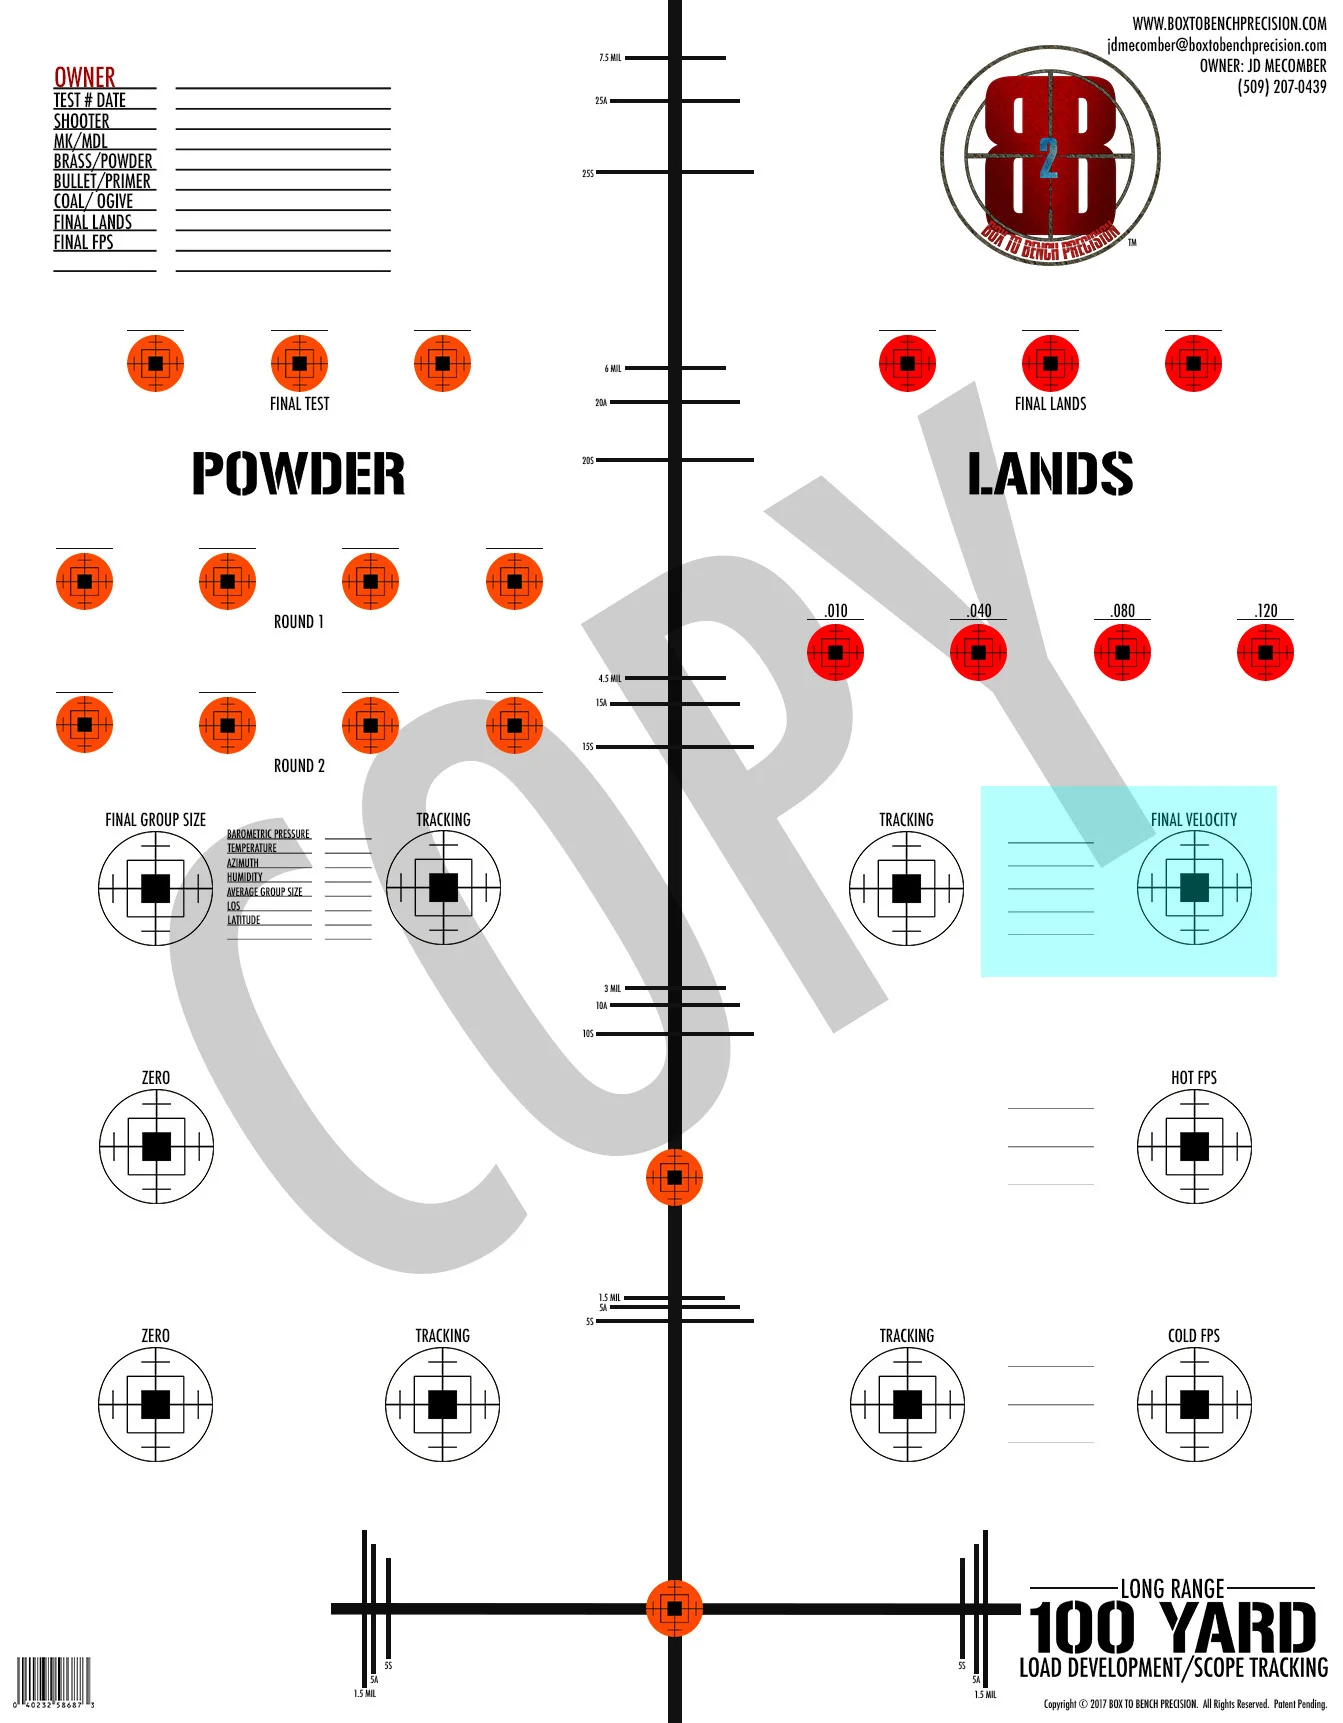
Final Velocity Test:
Final velocity will be at least five shots, preferably 10. This test will provide the data for average velocity as well as ES and SD.
Velocities can be collected using a shooting chronograph, a Magneto Speed or a radar device.
The final velocity test may have a slightly compromised group if a Magneto Speed is used, so be aware.
This data will be the data you enter into your ballistics app.
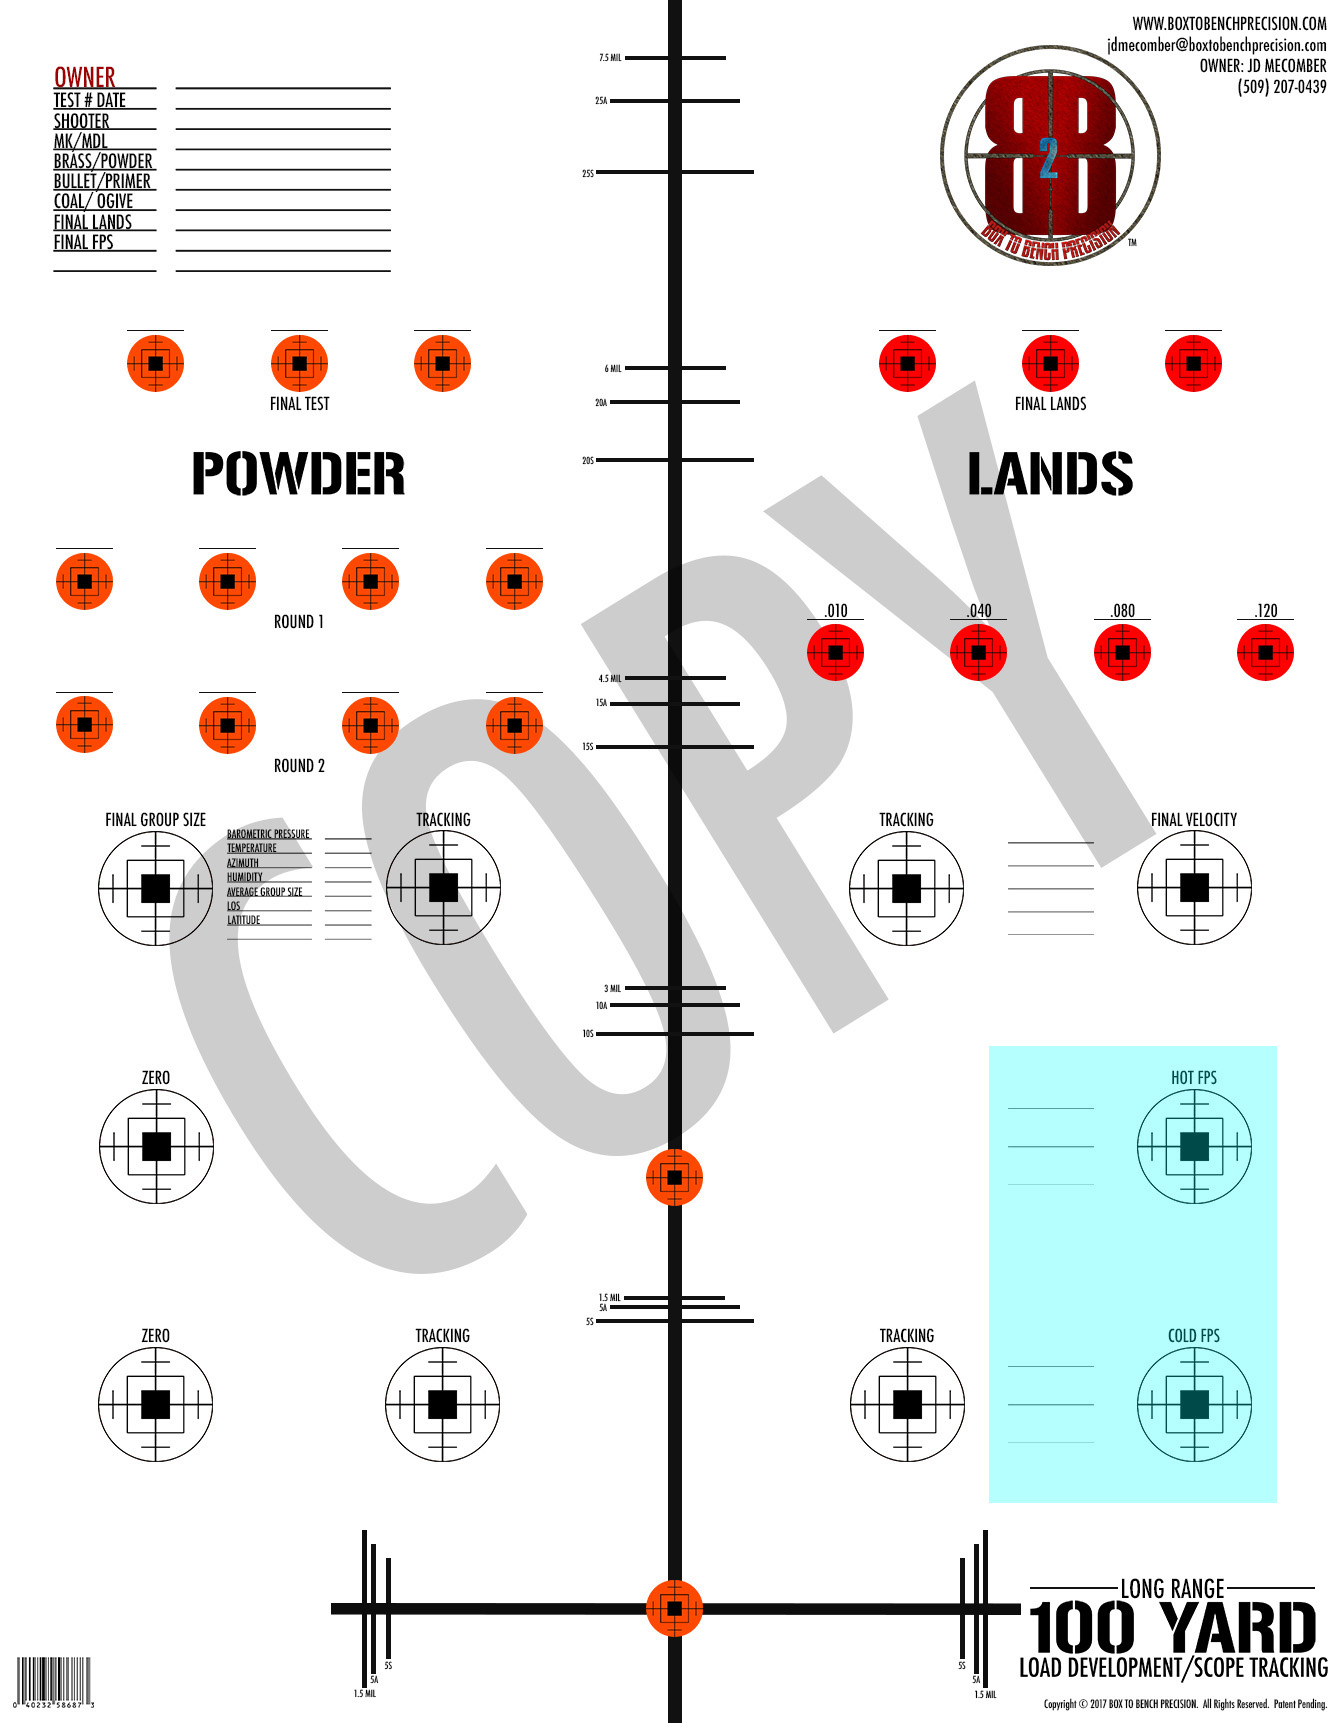
The Hot/Cold FPS Test:
Note: Record both hot and cold temperatures for this test. Use a Magneto Speed, or other velocity measuring device for this test.
The hot and cold velocity test is used to determine relative sensitivity of your load in extreme conditions.
Try to conduct the cold portion of this test, in relative coolness, with 3 rounds that have been in the freezer for at least 20 minutes. Make sure the rifle has been in a cool place as well. Take 3 shots and record the data in the spaces provided.
For the hot test, try to conduct the test in conditions that are near 100 degrees. Both rifle and ammo need to be very warm. A table top thermometer or thermal temperature device can be used to note the temperature of ammo and rifle. Take 3 shots and record the data in the spaces provided.
This test provides you with data that can help you make adjustments to your ballistic app as conditions necessitate.

Final Group Size:
Final Group Test shall be conducted after final velocity, without devices (Magneto Speed) on the barrel.
The final group is to be determined by taking 5 shots at the 2-inch spot, with 1/4-inch reference marks for fast and easy observation of group size.
Located beside the spot are spaces to record pertinent data regarding current conditions. This data will be entered into your ballistics app.
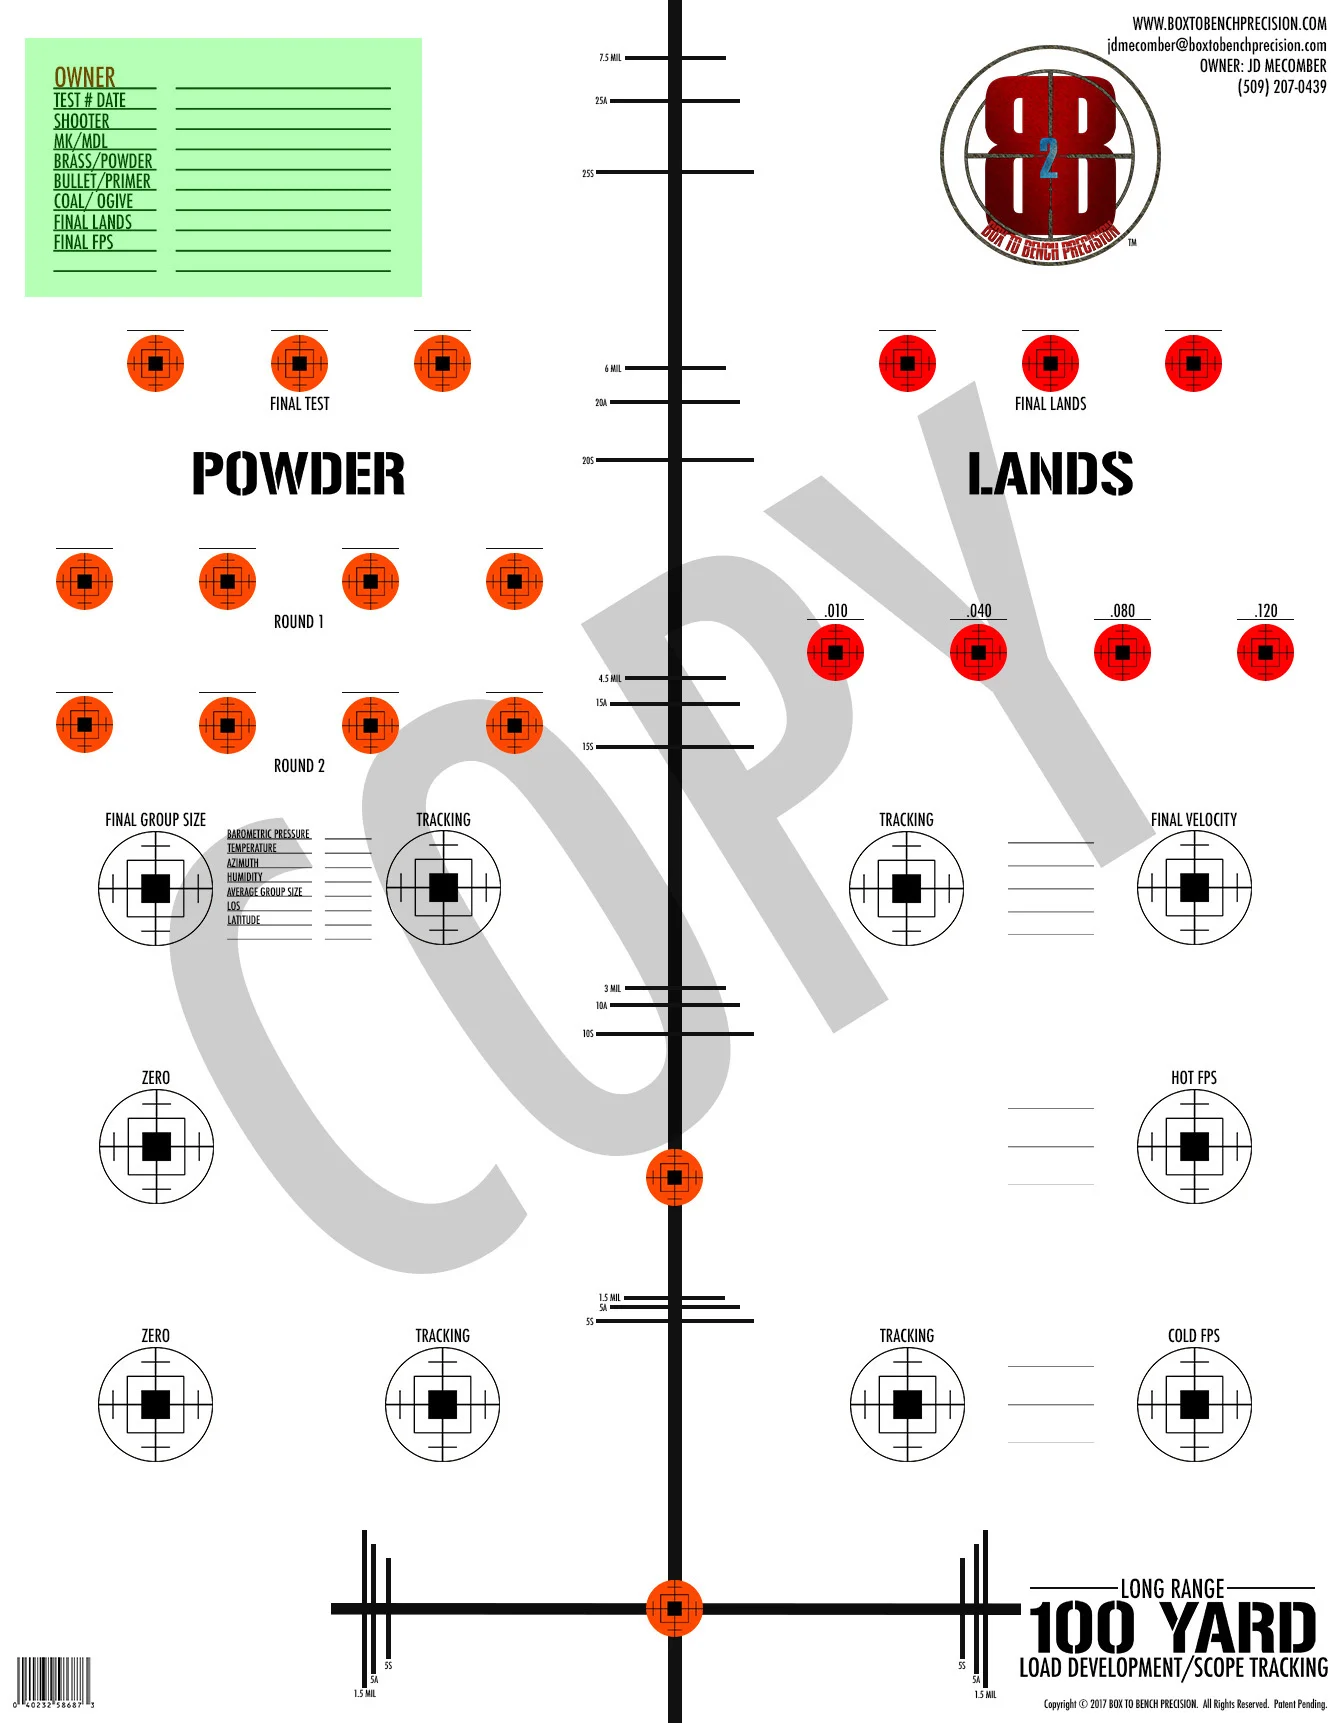
Owner/Rifle Data:
Owner of the rifle being tested
Test number and date
Shooter
Make and model of the rifle
Brass and powder tested
Bullet used and primer choice
Overall length of the round and the ogive
Final lands
Final feet per second
Box test: 2018 100 Yard Long Range Load Development and Scope Tracking:
You have 4 tracking shooting spots on the target. In the center of those 4 shooting spots is an orange 1” circle. This will be your starting point. You will keep your crosshairs on this orange circle while you dial your scope around in a box pattern while firing a shot at each of the 4 tracking shooting spots and a final shot at the center orange spot. Listed are the directions for IPHY, MIL and MOA.
MOA:
Dial 3.75 down, left 8.50 shot number one, up 7.75 shot number 2, right 17.25 shot number 3, down 7.75 shot number 4, left 8.50 and up 3.75 shot number 5.
MIL:
Dial 1.1 down, left 2.5 shot number one, up 2.2 shot number 2, right 5 shot number 3, down 2.2 shot number 4, left 2.5 and up 1.1 shot number 5.
IPHY:
Dial in inches, 4 down, left 9 shot number one, up 8 shot number 2, right 18 shot number 3, down 8 shot number 4, left 9 and up 4 final shot number 5.
Box test: 100 Meter Long Range Load Development and Scope Tracking:
You have 4 tracking shooting spots on the target. In the center of those 4 shooting spots is an orange little over an inch circle. This will be your starting point. You will keep your cross hairs on this orange circle while you dial your scope around in a box pattern while firing a shot at each of the 4 tracking shooting spots and a final shot at the center orange spot. Listed are the directions for IPHY, MIL and MOA.
IPHY:
Dial 3.75 down, left 8.25 shot number one, up 7.25 fire shot number 2, right 16.5 shot number 3, down 7.25 shot number 4, left 8.25 and up 3.75 shot number 5
MILS:
Dial 1.2 down, left 2.3 shot number 1, up 2 shot number 2, right 4.6 shot number 3, down 2 shot number 4, left 2.3 and up 1.2 shot number 5
MOA:
Dial 3.5 down, left 7.75 shot number 1, up 7 shot number 2, right 15.75 shot number 3, down 7 shot number 4, left 7.75 and up 3.5 with final shot number 5.
Stackable 100 Meters:
You have four large shooting squares in a box shape. The start point is the half moon bulls eye at the bottom of the target. Keep your crosshairs on the bulls eye at all times while you dial around in a box pattern shooting each square.
IPHY:
Dial up 8.25, left 6 shot number 1, up 10 shot number 2, right 12 shot number 3 and down 10 shot number 4.
MILS:
Dial up 2.3, left 1.6 shot number 1, up 2.8 shot number 2, right 3.3 shot number 4 and down 2.8 shot number 4.
MOA:
Dial up 7.75, left 5.75 shot number 1, up 9.5 shot number 2, right 11.25 shot number 3 and down 9.5 shot number 4.
Stackable 100 Yards:
You have four large shooting squares in a box shape. The start point is the half moon bulls eye at the bottom of the target. Keep your crosshairs on the bulls eye at all times while you dial around in a box pattern shooting each square.
IPHY:
Dial up 7.75 and left 6.5 fire shot number 1, up 11 fire shot number 2, right 13 fire shot number 3, down 11 fire shot number 4.
MILS:
Dial up 2.1 and left 1.8 fire shot number 1, up 3.0 fire shot number 2, right 3.6 fire shot number 3, and down 3.0 for shot number 4.
MOA:
Dial up 7.5 and left 6.25 shot number 1, up 10.5 shot number 2, right 12.5 fire shot number 3, and down 10.5 for shot number 4